Migrating WordPress to Managed WordPress Hosting
Migrating your WordPress website to Managed WordPress hosting is an important task. It is not just a technical task. It is a step towards improving your website’s performance and reliability.
Slow load time, frequent downtime, etc can be frustrating for anyone. Hence, migration opens the door to a new, hassle-free path. Migrating your WordPress site to Managed WordPress hosting saves you time and energy. So, you can concentrate on producing amazing content and engaging your audience.
In this guide, we will walk you through the entire process of migrating your WordPress site. The instructions are clearly stated throughout, making the transition to your new hosting plans less hassle. Let’s get started!
Why Managed WordPress Hosting?
- Managed WordPress hosting is tailored to meet the unique needs of WordPress websites. Here are some benefits:
- Speed: Through managed hosting, your website is made to load faster and improve site performance.
- Security: Managed hosting includes advanced security measures like firewalls, malware scans, and regular backups to protect the site.
- Automatic Backups: Your website is backed up regularly, so critical data is safe and cannot be lost.
- Expert Support: Dedicated WordPress experts are available to resolve technical issues with Managed Hosting.
- Automatic Updates: Your WordPress core, themes, and plugins are kept up-to-date automatically.
Migrate Your WordPress Site to Managed WordPress Hosting in Simple Steps
Step 1: Choose the Right Managed Hosting Provider
Before you start, pick a reliable managed hosting provider. Look for one with:
- Good Reviews: Check customer feedback to ensure the service is trustworthy.
- Features You Need: Quick and easy backups, SSL certificates, and staging areas should also be free.
- Helpful Support: Select a host with round-the-clock customer service support.
Popular managed WordPress hosts include:
- WP Engine: Known for both high performance and scalability.
- Kinsta: Good, fast, has nice-looking dashboards.
- SiteGround: Inexpensive and great for the beginners.
- RealCloud: Easy, fast, and high performance.
Do not rush into choosing the specific plan and tariffs. It is crucial to make a proper choice.
Step 2: Back Up Your WordPress Site
Ensure that you always take a backup of the website that you wish to alter.
How to Back Up:
Use a Plugin:
- Suggested plugins are UpdraftPlus or Duplicator plugins.
- To pay homage to the plugin’s command, initiate a full backup of all website files and data.
- Download the backup to your computer or other safe location such as Google Drive or any similar platform.
Manual Backup (Optional):
- For example, you may use an FTP tool like FileZilla to download all your website-related files.
- Now, log into phpmyadmin and export your database.
Step 3: New Managed Hosting Buyer Information
When you have identified the best-managed hosting provider, create an account with them.
- Create Your Account: Provide your details and choose a plan that fits your website size and traffic.
- Log In to the Dashboard: After setting up your account, access your hosting dashboard.
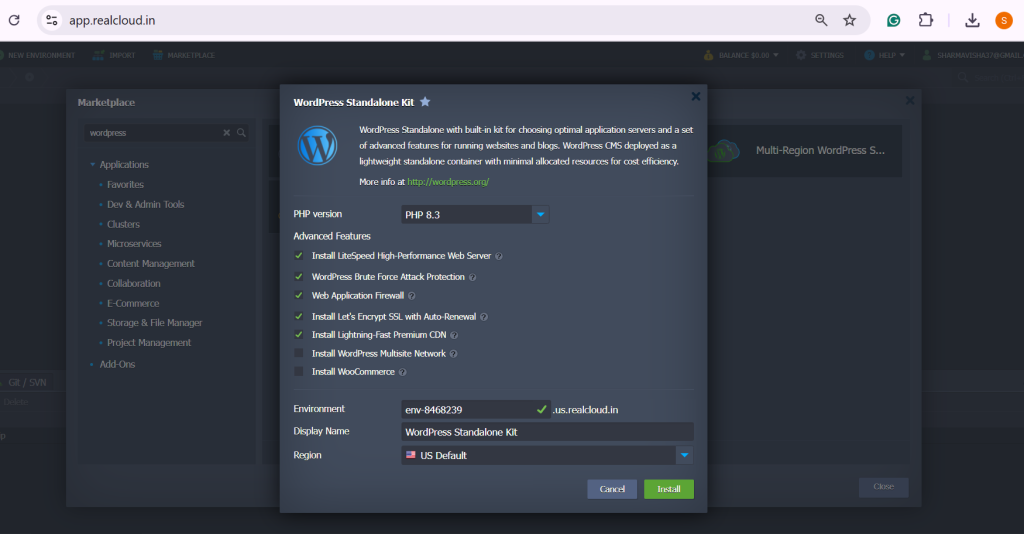
- Install WordPress (If Needed): Some managed hosting providers automatically install WordPress for you. If not, use their one-click installation feature to set it up. If you choose RealCloud, then provide a One-Click installation.
Step 4: Migrate Your Website to the New Host
Now, comes the time to relocate your website. There are two main ways to do this: with a migration plugin or manually migrating process.
Option 1: Using a Migration Plugin
This is the easiest way to transfer your site. Here’s how:
- Install a Plugin: Add a migration plugin like All-in-One WP Migration or Migrate Guru to your existing site.
- Export Your Site: Use the plugin to create a file that contains all your website data.
- Upload to the New Host: Log in to your new hosting account and use the plugin to import the file.
Most plugins make this process simple, even for beginners.
Option 2: Manual Migration
If you prefer to do things manually:
- Export Your Database:
- Log in to your old hosting account.
- Open phpMyAdmin and export your WordPress database.
- Copy Your Files:
- To do this use an FTP client to download all your site files in particular the wp-content folder.
- Upload to the New Host:
- Use FTP to upload your files to the new hosting server.
- Import your database into the new server’s phpMyAdmin.
- Update wp-config.php:
- Update the number of database details in the wp-config.php file including the host, username, and password.
Step 5: Update DNS Settings
Your domain name needs to point to your new hosting provider. This step ensures visitors see your site on the new server.
- Log In to Your Domain Registrar:
- Go to your domain registrar service provider such as GoDaddy or Namecheap.
- Find DNS Settings:
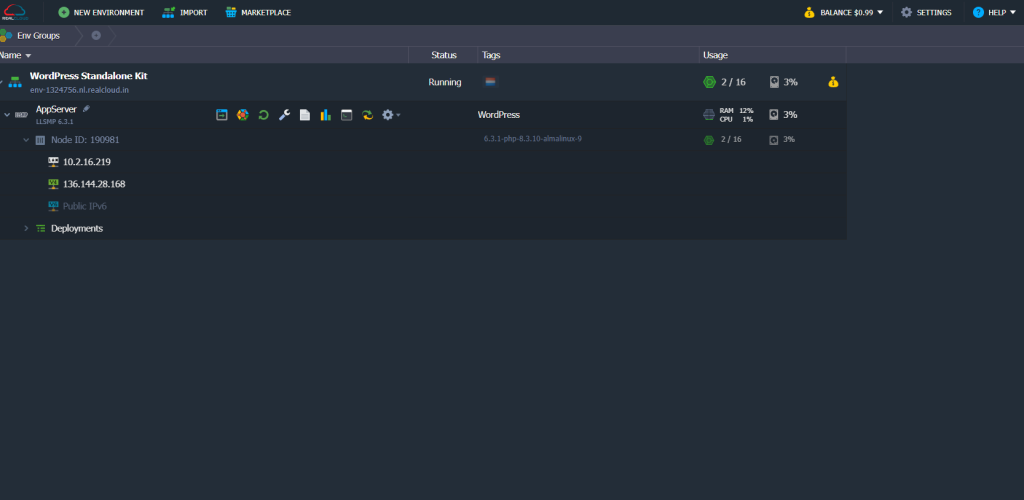
- Look for the DNS or Nameserver settings in your account dashboard. (Find your RealCloud DNS in the registered ID’s mailbox as well as under “Appserver” on the dashboard.)
- Update Nameservers:
- Update the current nameservers with those provided by the new hosting service provider.
- Save the changes.
Step 6: Test Your Website
Once your site is live on the new host, test everything thoroughly.
- Check Pages: Open all your important pages to ensure they load correctly.
- Test Links: Click on links to see if they redirect properly.
- Inspect Plugins and Themes: Make sure plugins and themes work as expected.
If you find issues, contact your new hosting provider’s support team. Managed WordPress hosts specialize in helping customers with such problems.
Step 7: Cancel Your Old Hosting Plan
When you’re confident everything is working perfectly on the new host, cancel your old hosting account.
- Double-Check Backups: Ensure you still have backups stored safely.
- Confirm Domain Propagation: Make sure your domain is pointing to the new host before canceling.